- Home
- Homemade Traps
- Homemade Mole Trap
Homemade Mole Trap
This post may contain affiliate links so I earn a commission.
Using a homemade mole trap to catch unwanted moles in your lawn or garden is a great way to get rid of moles fast by using some items commonly found around most homes.
Nothing is more frustrating than having your beautiful lawn or garden destroyed by moles.
You've spent countless hours and money making your lawn look perfect, and overnight a mole can ruin everything.
Moles are born to dig, and they dig at an alarming rate as they search for food.
Moles love to feed on earthworms which are commonly found just below the surface.
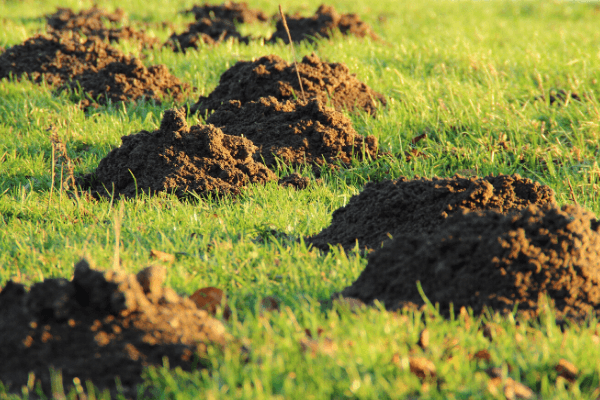
As the moles tunnel in search of worms, they leave their distinctive tunnels and mounds behind, killing your grass and making your flat lawn feel like it's full of speed bumps.
The grass dies and turns brown because the tunneling disturbs the roots.
Although this damage is cosmetic, it can lead to hundreds of dollars in time and repairs.
Supplies Needed For A Homemade Mole Trap
There's no shortage of mole traps and poisons on the market today.
However, a majority of these traps don't allow you to live trap a mole and release it at another location.
This style of trap is believed to be around since the Roman empire.
As Roman sites were excavated and studied, they found earthenware pots buried to the rim underground!
To make your homemade mole trap you'll need the following items:
- Empty and clean 3 pound coffee can or wide mouth quart sized mason jar
- 1 board to cover the buried trap and not allow any light into the hole
- Shovel or hand spade to dig the hole for the trap
Setting The Mole Live Trap
In order to be successful at trapping a mole, you need to locate a tunnel that the mole is actively using.
Look for a tunnel that is long and relatively straight.
This will be the main tunnel the mole uses everyday.
Avoid the tunnels that branch off and seemingly zig zag everywhere.
These are feeding tunnels that the mole may not use again.
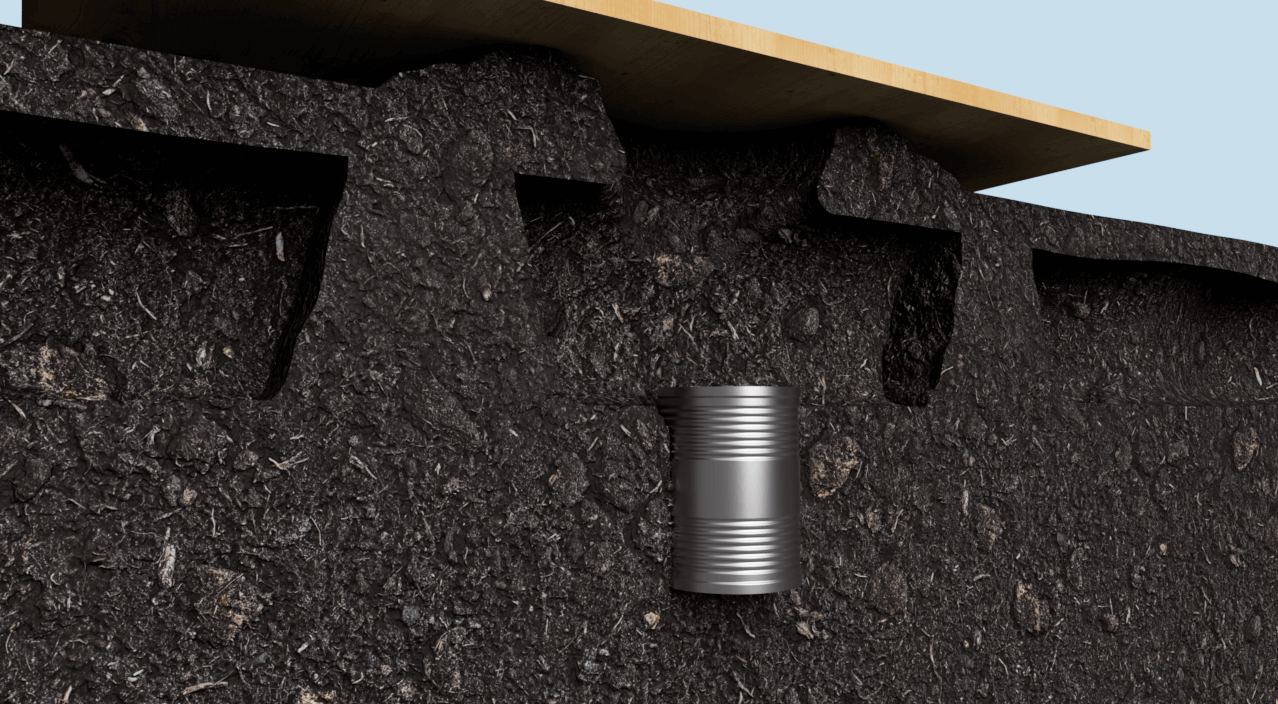
Once you've located the main tunnel, take your shovel and make a clean cut into the tunnel.
Remove enough dirt so your container will fit inside the hole.
When you cut into the tunnel you'll be able to see and feel the mole tunnel.
Dig your hole deep enough so the top of the container is even with the bottom of the mole tunnel as shown in the photo below.
 Homemade Mole Trap
You can also cave in the tunnel on each end of the container by stepping down on it.
This will cause the mole to dig away the caved in section as it travels down the tunnel, and fall into your container.
Use a board to cover up your trap and you're done!
Make sure the board covers the entire area because you don't want any light to enter the tunnel.
Removing The Mole From Your Trap
If everything goes as planned, you'll have a live mole inside your container.
At this point you can take the mole to another area and release it.
Moles are pretty territorial, so even though there may be a lot of tunnels in one area, it's probably just one mole so you don't really need to reset the trap back in the same spot.
If you have another separate area of your lawn that's being damaged you can reset the trap in the new area.
Homemade Mole Trap - Overall
Using a coffee can or mason jar to make a homemade mole traps works pretty well and it's a simple way to live trap a mole so it can be relocated somewhere else!

Recent Articles
-
The Best Spray For Bed Bugs - Top Reviews And Natural Remedies
 How to choose and apply the best spray for bed bugs at home to kill them instantly. Learn if sprays work better than heat or diatomaceous earth for bed bugs.
 -
6 Best Essential Oils For Ants - Get Rid Of Ants Naturally
Are essential oils for ants the best way to naturally remove them from your home? Learn how to use peppermint, cinnamon and other oils to get rid of ants fast. -
Trapping Pocket Gophers - How To Get Rid Of Them
Learn the best tips and ideas for trapping pocket gophers in your lawn, field or garden. Explains how to locate a tunnel and properly set an effective trap to kill a gopher.