- Home
- Muskrat Trapping
- Colony Trap Plans
Colony Trap Plans
This post may contain affiliate links so I earn a commission.
These colony trap plans create a great way to make your own muskrat colony trap at home, using just a few simple tools.
The trap is sturdy, it functions great and it will last for many years.
Plus, building your own trap is cheaper than buying one from the store and it's more exciting when you catch a muskrat in a trap you've built yourself.
Colony traps work great for trapping muskrats because you can catch multiple muskrats in a single day, something that's not possible if you're using just a conibear trap or footholds.
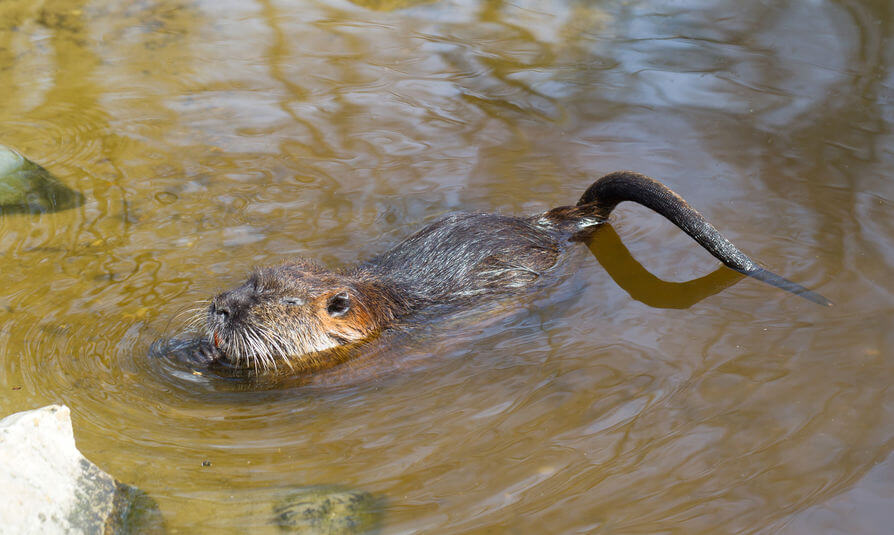
The traps work best when they're set in a muskrat run that's funneled into a small area, such as a noticeable run heading into a bank, or a heavy run leading through thick vegetation.
Small creeks or steams are also a great spot to use a colony trap, especially where the stream narrows and the muskrats are forced to go through the trap.
A colony trap is basically a rectangular box made from steel mesh with one way doors on each end.
The one way doors allow the muskrats to enter the trap from either direction, but they can not leave.
When placed in water that completely submerges the trap, the muskrats quickly expire and are easily removed when you check the trap the following day.
Colony Trap Plans - Supplies
You can use a variety of different styles of wire to build your trap but I've found 1'' x 2'' 14 gauge wire works the best.
1" x 1" 16 gauge will also work but the thicker 14 gauge wire is a lot sturdier and the 1" x 2" doesn't catch a lot of weeds.
It also allows flowing water to easy pass through the trap without lifting up the entry doors.
In addition, the 14 gauge wire creates a much stronger door than the 16 gauge wire.
This prevents a mink from blowing out the door from the inside out if it happens to enter your trap to eat one of the muskrats inside.
I also used J clips, or rabbit cage clips, to fasten the wire on the sides and to install the doors.
You can also use hog rings, or simply bend the metal wire around itself to create a loop.
I like using the J clips because they give a nice professional looking finish and when used on the doors, they allow them to swing freely without binding.
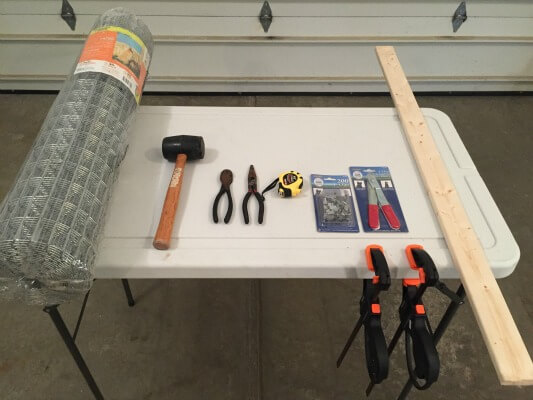
The following supplies were used to construct the trap:
- 1 roll of 1" x 2" 14 gauge steel rabbit cage wire
- J clips installed with J clip pliers
- Rubber mallet/hammer
- 2 clamps
- Scrap piece of 1" x 3" lumber
- Wire cutters and plyers
Colony Trap Plans - Construction
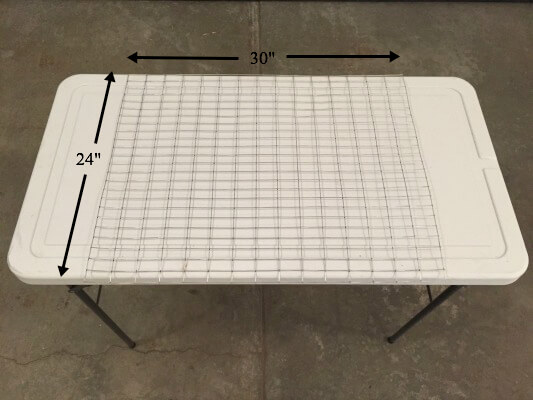
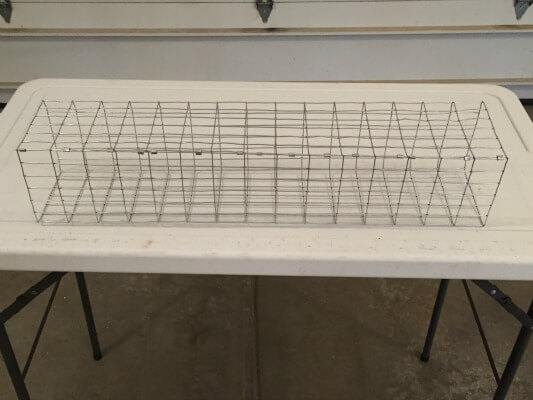
Begin by cutting a piece of wire 24" long by 30" wide.
Since the wire roll was originally 36" wide, the trap can be any length you want up to 36".
I chose 30" because they're easier to transport but large enough to catch multiple muskrats at one time without plugging up the trap.
Use a hammer or rubber mallet to pound the wire as flat as possible.
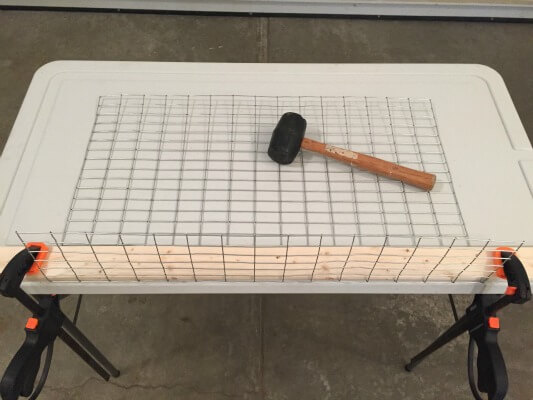
Measure 6" for the first side of the trap and bend the wire up at a 90 degree angle.
You can use the scrap piece of lumber and 2 clamps to make an edge to bend the metal against.
Since each square is 1" tall you can simply count 6 squares which is easier than using a tape measure.
I found it's easiest to begin the bend with your hands then take a hammer and square it up along the bottom making a nice, crisp, 90 degree bend.
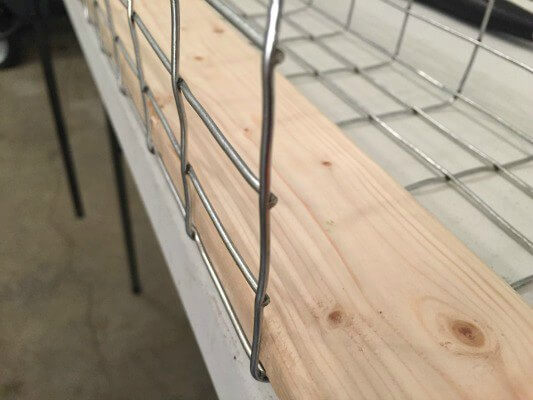
Here's a closer view of the first bend on the colony trap plans.
Next, measure another 6" and make the second bend using the same method as above.
Now, repeat the process again bending a third time and completing the rectangle.
You should now have a rectangle with each measuring 6 inches wide by 30'' long.
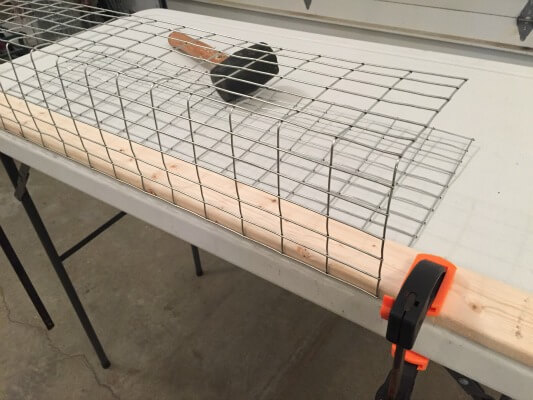
Secure the wire together to complete the rectangle.
Use 1 J clip for every 2" section of wire.
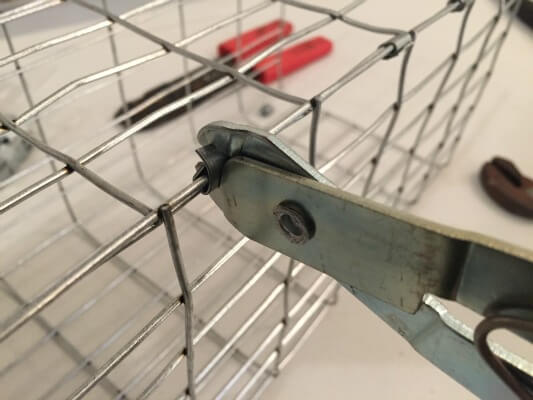
Here's a closer view of the J clip being installed on every 2" square.
You will use 15 J clips total.
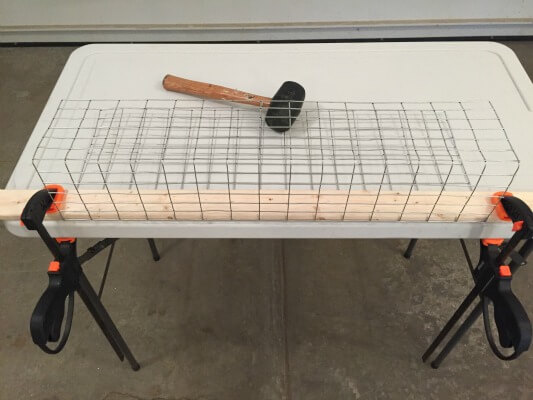
If you've followed the colony trap plans correctly you should now have a rigid, metal rectangular trap measuring 6" wide by 30" deep held together by 15 J clips.
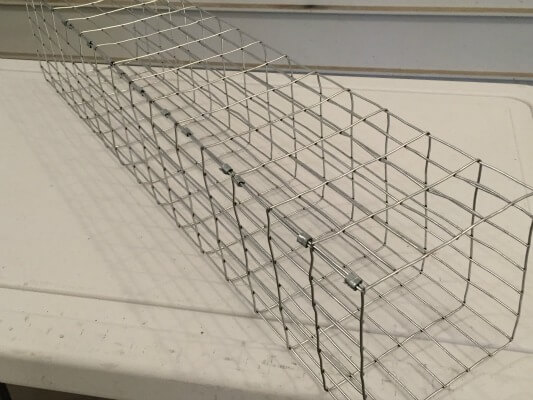
Here's another view.

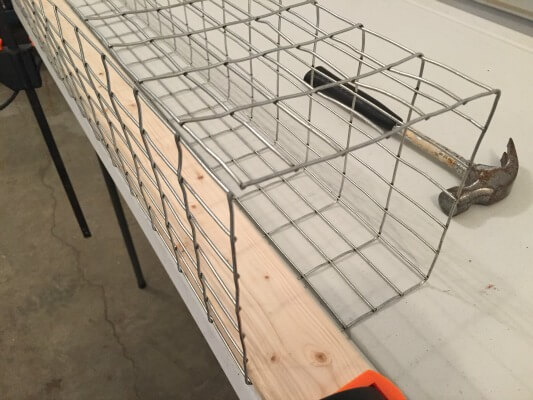
To make the doors, cut 2 additional pieces of wire 5" wide by 8" long.
Hammer the wire as flat as possible.
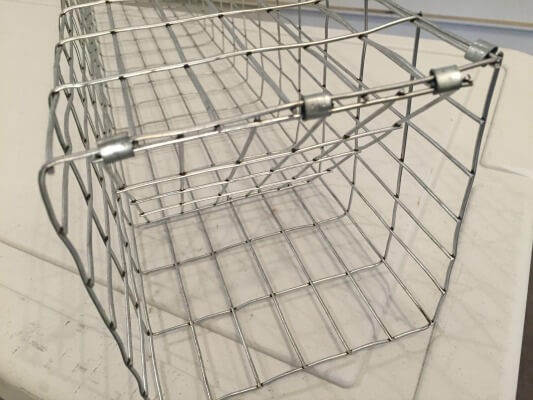
Secure 1 piece of 5" x 8" wire to each side of the box as shown to create one way doors on each end.
Since the trap is 6" wide and the doors are only 5" wide, allow about a 1/2" gap on each side to center the door.
Use 3 equally spaced J clips for each door to secure it to the trap.
Don't crimp the J clips too hard on the door.
Crimp them just tight enough so the door is stable, but loose enough to allow the door to open and close freely.

That's it, you're done!
These colony trap plans allow you to create a solid muskrat trap that works great for trapping multiple muskrats at one time.
The trap should take about 30 minutes to 1 hour to make and will last for many years.

Recent Articles
-
The Best Spray For Bed Bugs - Top Reviews And Natural Remedies
 How to choose and apply the best spray for bed bugs at home to kill them instantly. Learn if sprays work better than heat or diatomaceous earth for bed bugs.
 -
6 Best Essential Oils For Ants - Get Rid Of Ants Naturally
Are essential oils for ants the best way to naturally remove them from your home? Learn how to use peppermint, cinnamon and other oils to get rid of ants fast. -
Trapping Pocket Gophers - How To Get Rid Of Them
Learn the best tips and ideas for trapping pocket gophers in your lawn, field or garden. Explains how to locate a tunnel and properly set an effective trap to kill a gopher.