- Home
- Homemade Traps
- Diy Carpenter Bee Trap
DIY Carpenter Bee Trap
This post may contain affiliate links so I earn a commission.
Making a DIY carpenter bee trap is a simple and cost effective way to get rid of carpenter bees that are causing damage to your deck, barn or home.
Carpenter bees can be devastating to the structural integrity of your house.
Damage occurs as the female bee chews circular holes into the wood, creating a place to lay her eggs.
These "galleries" as they're called are typically smooth, about 1/2" wide and about 6"-7" deep.
However, if a carpenter bee reuses an existing gallery, the tunnels can expand up to 10 feet in length!

By building your own homemade carpenter bee trap, you mimic these galleries that are built by the bees.
The trap consists of a piece of wood that has three 1/2" holes drilled on an upward angle into three sides of the wood.
There's also a 3/4" main tunnel hole that's drilled up from the bottom which is covered by a clear glass mason jar.
Carpenter bees love to enter pre-existing holes to explore and expand the nest (which is what the pre-drilled holes mimic).
The side holes are drilled at a 45 degree upward angle which prevents any light from entering the trap through the sides.
The only light the bees can see after they enter the trap is the light shining through the mason jar, up through the bottom of the main tunnel.
As the bees crawl down the main tunnel to exit the wood (thinking they're just going outside), they climb into the mason jar and are trapped.
It's simple and it works great!
Building The DIY Carpenter Bee Trap
There's a lot of different variations of this trap, but I've found using an old piece of firewood with a mason jar works really well.
You can also use a scrap piece of untreated 4x4 post and a water bottle to replace the mason jar if you'd like.
Softwoods like pine are preferred, but I've found it really doesn't matter what kind of wood you use.
For this trap, I'm using a dry piece of ash firewood that has been split to a diameter of around 5x5 inches.
A round, un-spilt piece of wood that has the same diameter works just as well.

Cut the piece of wood to 10 inches in total length, then cut a 30 degree angle off the top of the wood.
When you cut the angle, don't take any total length off the trap.
You're just making a slanted roof to help shed rainwater.

Next, flip the wood over and find the center.
Using a 3/4" drill bit, drill a hole 5 inches deep through the base of the wood.
To make the hole 5 inches deep, just measure your drill bit and place a piece of tape at 5 inches.
Then as you drill the hole, stop drilling when you reach your tape!

Now, using a 1/2" drill bit, drill an upward slanted hole on 3 sides of the wood.
The 1/2" holes should have a 45 degree upward slant toward the top of the trap.
These are the holes the carpenter bees will enter, but the upward slant won't allow any light inside of the trap.
These holes need to intersect the 3/4" main tunnel that you previously drilled.
I just measured up 2 1/2 inches from the bottom of the wood and drilled the holes which were roughly 2 1/2 inches deep.
You'll feel the resistance change on your drill bit when you reach the main tunnel.
To check the holes, just blow through them to make sure they're connected.

The next step in the DIY carpenter bee trap is to attach the mason jar to the bottom of the trap.
Using a 1/2" titanium or cobalt drill bit designed for drilling into metal, drill a 1/2" hole in the center of the mason jar lid as shown below.
Then, place the lid in the jar ring and secure the lid to the bottom of the trap using a couple screws or nails.
Using a punch to make a small pilot hole allows you the easily attach the lid.
Just make sure to center the hole in the lid with the main tunnel hole in the trap.

Now, take a metal staple and pound it into the top of the trap.
This will be used as a hanger to hang the trap where you're noticing carpenter bee activity.

That's it, your DIY carpenter bee trap is done!

Do Carpenter Bee Traps Really Work?
Yes!
Homemade carpenter bee traps work great because they mimic the natural holes carved into wood by carpenter bees.
For best results, you should locate any existing carpenter bee holes in your deck, barn or home and treat them with an insecticide.
Once the holes are treated, fill them with steel wool, caulk, a dowel rod and glue, or even a ball of aluminum foil.

BioAdvanced Carpenter Bee Killer
This will prevent the carpenter bees from going into these pre-existing holes, making your trap much more appealing.
Does The Carpenter Bee Trap Need Bait?
No.
Although some people add a little bit of sugar water to the bottom of the trap, it's not necessary.
In fact, once you trap your first carpenter bee in the trap and it perishes, the carpenter bee will release a pheromone that actually attracts more bees.
So, the more bees you catch, the better the trap will work!
DIY Carpenter Bee Trap - Overall
This homemade carpenter bee trap is easy to make and it works great!
Plus, it should only take you about 15-20 minutes to make the trap if you have the supplies laying around your house.
If you've noticed carpenter bee damage around your home, gazebo, or deck, don't wait to take care of them.....do it now!
The damage will only get worse if you don't do something to get rid of the carpenter bees.
Luckily you can make several of these traps for just a few dollars each and before you know it, your carpenter bee problem will be a distant memory.

Recent Articles
-
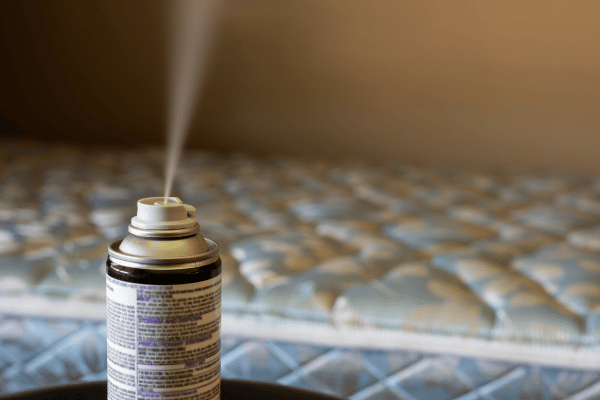
The Best Spray For Bed Bugs - Top Reviews And Natural Remedies
 How to choose and apply the best spray for bed bugs at home to kill them instantly. Learn if sprays work better than heat or diatomaceous earth for bed bugs.
 -
6 Best Essential Oils For Ants - Get Rid Of Ants Naturally
Are essential oils for ants the best way to naturally remove them from your home? Learn how to use peppermint, cinnamon and other oils to get rid of ants fast. -
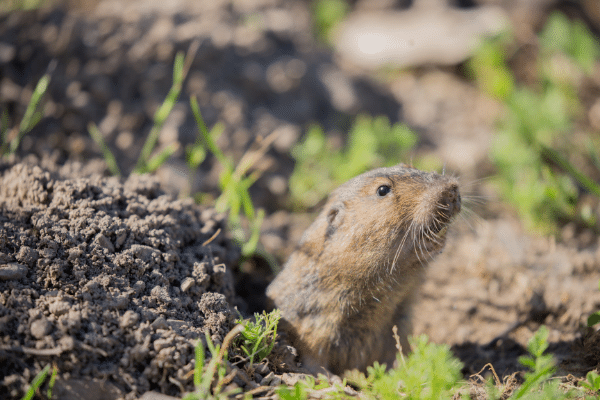
Trapping Pocket Gophers - How To Get Rid Of Them
Learn the best tips and ideas for trapping pocket gophers in your lawn, field or garden. Explains how to locate a tunnel and properly set an effective trap to kill a gopher.