- Home
- Rabbit Trapping
- Live Trap Plans
Live Trap Plans
This post may contain affiliate links so I earn a commission.
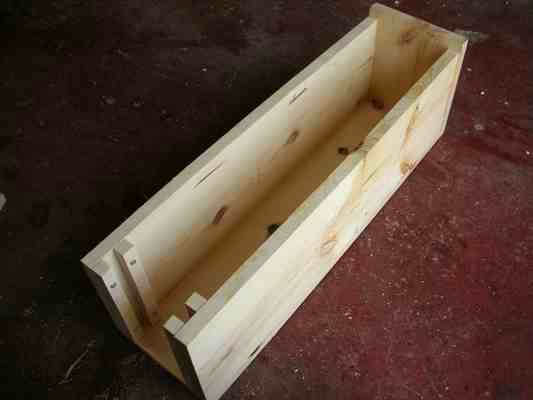
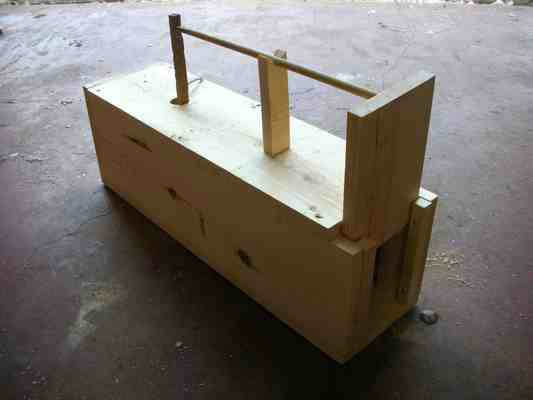
Using these free live trap plans will walk you through building your own box trap.
I've been using this style of box trap for years to successfully trap rabbits, squirrels and other small animals.
This trap works really well!
You can also build a homemade box trap to catch larger animals like raccoons, opossums, feral cats and skunks by building the box slightly bigger than the one shown below.
The most common animals trapped with a box trap are rabbits.

Studies show that a box trap actually outproduces a wire or steel live trap when targeting rabbits.
The dark box and natural wooden materials resemble a hole in the ground or even a hollow log.
This appeals to a rabbits natural instinct to enter these types of spaces.
Live Trap Plans - Lets Start Building!
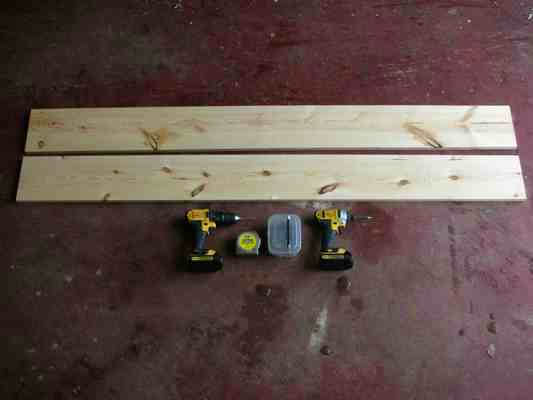
These live trap plans use a few simple supplies that can be found around your house or at your local lumberyard.
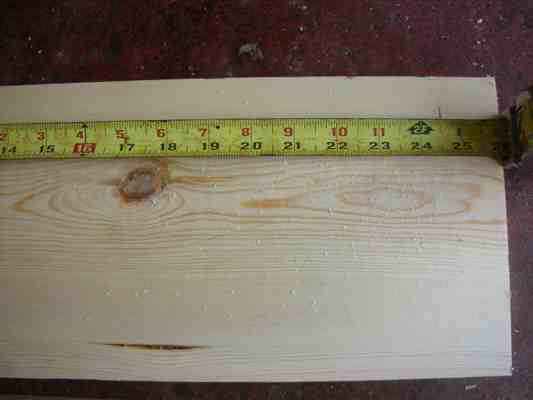
I chose to use two pieces of 6 foot 1'' x 8'' pine boards.
The 1'' x 8'' boards work perfectly for building the trap and you don't have to rip the boards on a table saw to make them work.
Simply cut them to length and you're done.
I spent around $4.50 each on the untreated pine boards and I used a few exterior screws I had laying around to assemble it.
The total cost of the project was around $10 and it took about an hour to complete it.
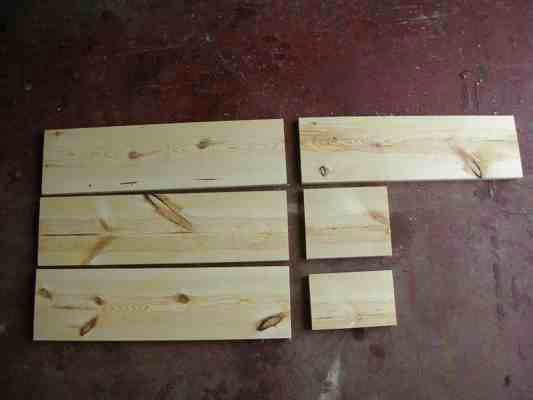
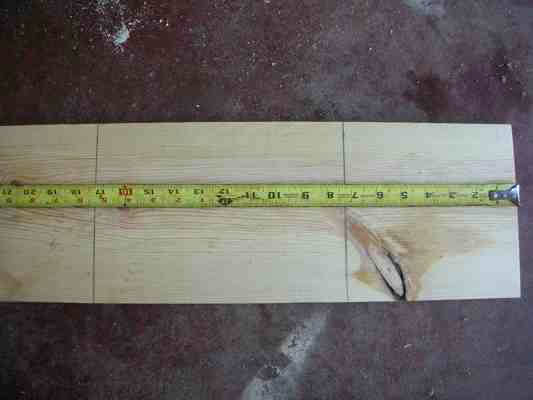
To begin the live trap plans, take the pine boards and cut three 26'' pieces.
These three pieces will be used for the two sides and the bottom.
Cut one piece 24 1/2'' long for the top.
Cut one piece 8 3/4'' long for the back.
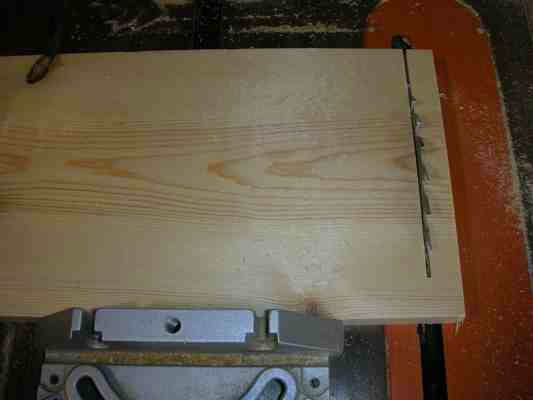
Cut one piece 8 1/2'' long for the front door.
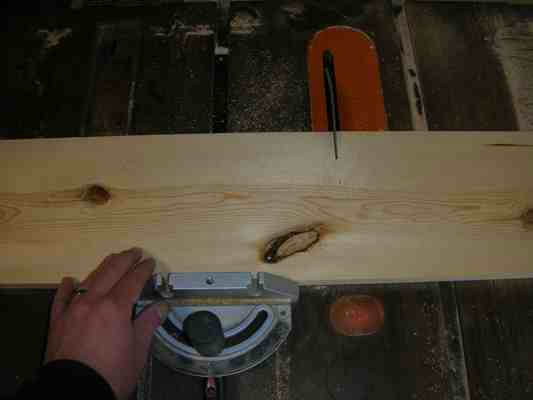
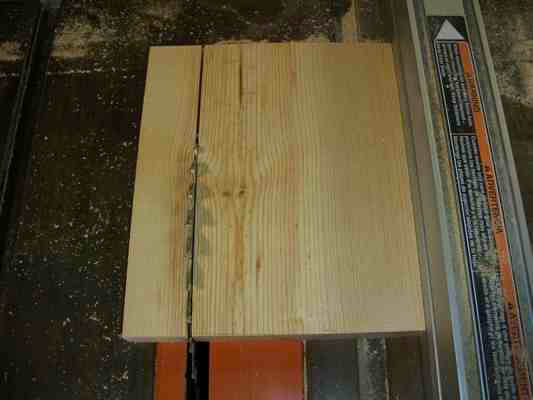
Your 8 1/2'' long door piece will need to be ripped to a width of 5 1/2'' wide.
This is the only piece of wood that needs to be ripped down to a smaller width.
Using a table saw makes ripping the wood easy for your live trap plans.
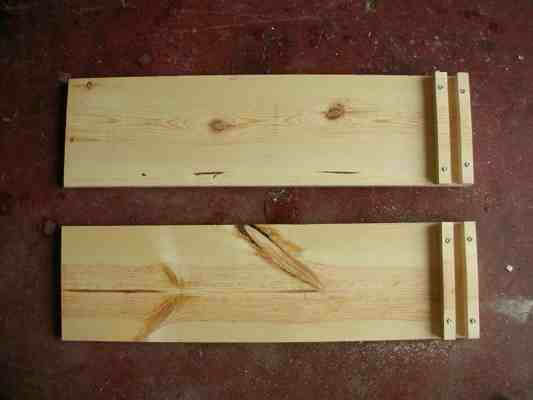
Your project should now look like this once you have all the lumber cut to size.
Next, take two of the 26'' long boards and mark a line at 24 1/2''.
This will be used as a guide to install 2 small pieces of wood used as a track for the door to slide in.
With the remaining scrap lumber cut 4 small pieces of wood 3/4'' wide.
These will be used to create the track for the door.
Since these pieces of wood are so thin, the pine will split easily.
To prevent this, pre-drill the small pieces of wood before nailing or screwing them to the sides.
This picture shows the 4 small pieces of wood screwed into the 26'' pieces used for the sides of the box trap.
Make sure to leave a gap large enough between the small pieces of wood so the door can slide though it smoothly without becoming jammed.
Next, take the 26'' bottom piece and screw or nail on the 8 3/4'' back piece.
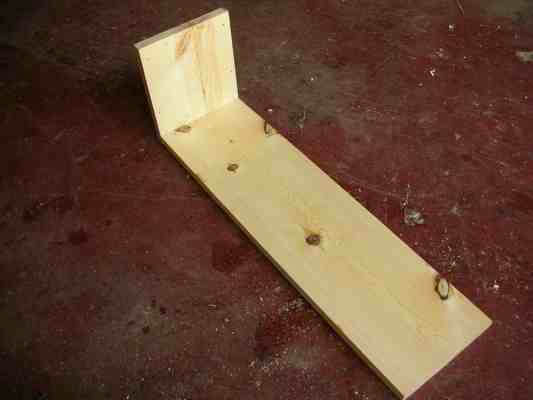
Now attach the two 26'' side pieces.
Using the 24 1/2'' top piece, mark a line at 7 1/4'' and again at 17 1/4''
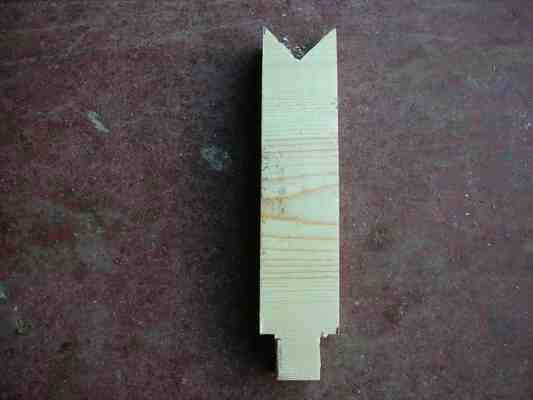
Next, take some more of the remaining scrap wood and cut a piece 1 1/2'' wide by 6 3/4'' tall.
Notch the bottom out and cut a "V" shape into the top.
The notch on the bottom is 3/4'' deep and the top "V" is about 3/4'' deep as well.
This will be used as the "door prop" that supports the door and trigger mechanisms.
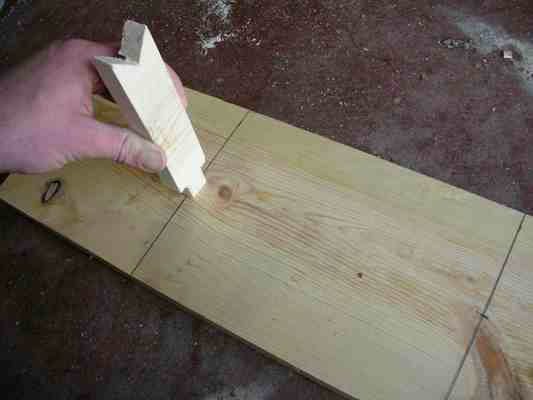
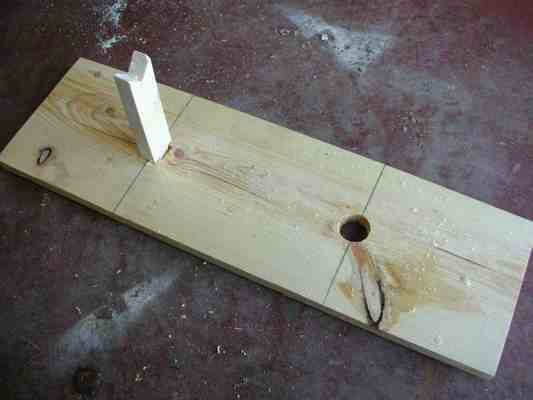
Place the "door prop" on the 17 1/4'' line you drew on the board.
Center it in the middle of the board and trace around it with a pencil.
Once the outline is traced, cut or chisel out the mark to make a hole and insert the "door prop" into it.
You can add a little wood glue to the joint if you want for added strength.
On the 7 1/4'' mark, bore a 1'' hole in the center.
This is where the trigger is inserted.
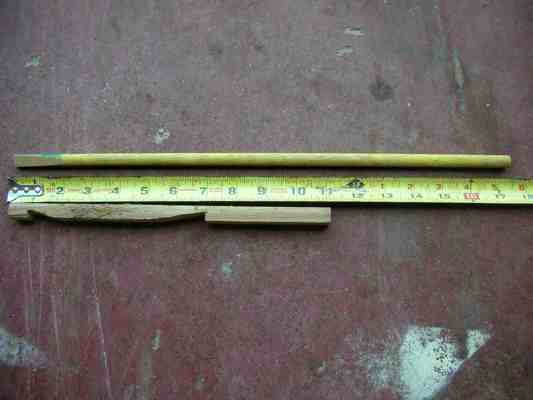
To make the trigger, you can either use some remaining scrap pine lumber or just a simple stick from outside will work.
I had an old piece of dowel rod laying around that I used for the stick that attaches the trigger to the door.
Cut notches into the trigger as shown below.
You also need to make a small flat spot on the end of the dowel rod to allow it to rest on the trigger.
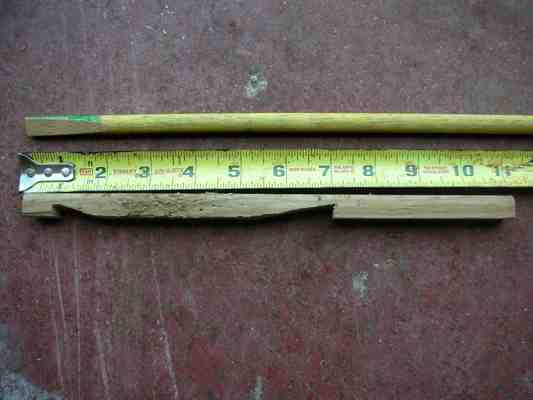
Here's a closer view.
Notice the flat spot on the end of the dowel rod?
When setting the trap, the flat dowel rod end will fit into the trigger notch cut at 1''.
The trigger notch cut at 7'' will rest in the 1'' hole you cut in the top of the trap.
When set, the weight of the door will apply pressure from the dowel rod to the trigger which holds it in place.
When the animal pushes on the trigger it will slide off and cause the door to fall.
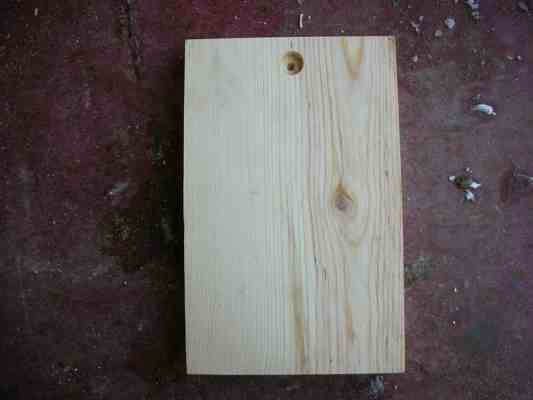
Finally, cut a centered 5/8'' hole in the top of the door but don't cut it all the way through.
Only go about half way into the wood.
That's it…..you're done!
If you followed the live trap plans correctly the final project should look like this.
Live Trap Plans - Using Your New Box Trap
To use the trap, place bait in the back of the box behind the trigger.
As the rabbit enters the box it will hit the trigger before it reaches the bait.
This causes the trigger to activate which in turn causes the door to fall, trapping the rabbit inside the box.
The trigger will usually fall inside the box when the trap goes off.
Don't be surprised if the rabbit chews on the trigger a little bit.
In a worst case scenario you will eventually have to make a new trigger.

Recent Articles
-
The Best Spray For Bed Bugs - Top Reviews And Natural Remedies
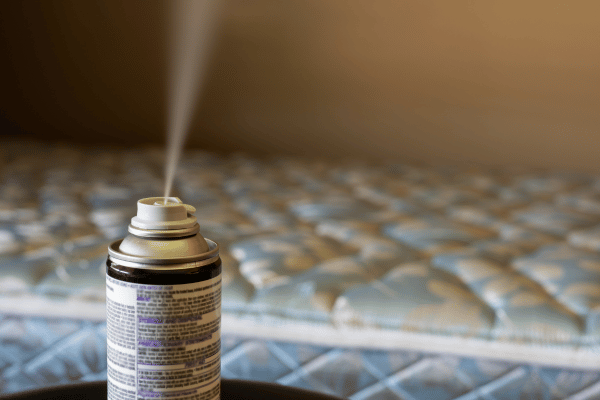 How to choose and apply the best spray for bed bugs at home to kill them instantly. Learn if sprays work better than heat or diatomaceous earth for bed bugs.
 -
6 Best Essential Oils For Ants - Get Rid Of Ants Naturally
 Are essential oils for ants the best way to naturally remove them from your home? Learn how to use peppermint, cinnamon and other oils to get rid of ants fast.
 -
Trapping Pocket Gophers - How To Get Rid Of Them
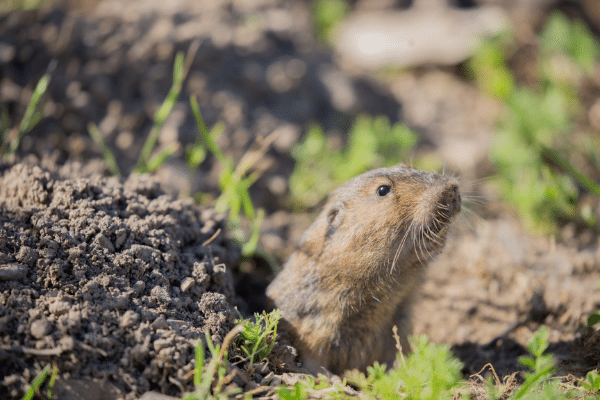 Learn the best tips and ideas for trapping pocket gophers in your lawn, field or garden. Explains how to locate a tunnel and properly set an effective trap to kill a gopher.